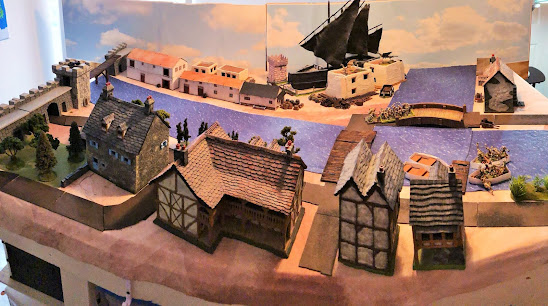
The Adventures of Stransky & Steiner Book 1 - Beastman Blood Bath
The first stop on this 20-something battle adventure is at the Beastmen of Chaos in the forests of the northern Empire. I felt pretty confident going into this battle as the scenario is a converted Flames of War scenario called “Probing Attack.” The nature of the game is such that the Beastmen cannot use their Ambush rule; taking away their ability to come in from all table sides.
The Scenario:
Probing Attack
Each side counts
up the number of units they have (characters don’t count) and half must be held
back in reserve. The deployment zones are along each long edge of the table, up
to 8” in from the edge. The deployment zone is divided into 6 zones (1 foot
long each) and your units are randomly assigned to each of the zone based on a
d6 roll, so you have no control over where your units will start. Units with
special deployment (scouts and Beastmen ambush units) must be placed in your
deployment zone, but you may choose where they go after the random units are
placed.

The Beastmen army list came from my “grab & go”/tournament army roster designed to take on any opponent in a “let’s play a game” informal environment.
The Shaman Lord of Shadow is accompanied by a Shaman Champion of Beasts and a level 1 Shadow Shaman. A Battle Standard Bearer rounds out the character allotment.
There are 6 units of 5 Ungor Raiders; 4 with short bows and 2 with
Slings along with a pair of units of 5 Chaos Hounds each. The core of the army
are a pair of Gor herds each with 20 Gor.
One unit has hand weapon & shield and the other has Additional Hand
Weapons. For the heavies: 14 Bestigor with great weapons, a Giant and a Gorgon.
The most challenging aspect of the list looks to be the presence of 7
magic levels on the board.
The Battlefield:

Special Scenery: Mountains are considered Very Difficult
Terrain, but skirmishers and loose formations (like Beastmen) pay no penalty
for movement on them. However, all units entering or moving on the mountain
must make a roll to determine if they find a way or if they lose anyone in the
difficult climb. This represents cliffs, boulders and stretches that are too
steep to be navigated. Those that fall out aren’t necessarily dead; more likely
suffering from broken bones or injuries due to a bad fall or falling rocks.
The Beastmen rolled high for deployment and selected the near side,
leaving my Empire army to struggle with the terrain up close. More so, a lot of
their army can move through the terrain without hindrance. So, what was
supposed to be an easy beginning of the adventure looks to be a challenge after
all!
Deployment:
The dice were rolled and the starting units were placed on the table,
like waiting to look at your hand when being dealt in poker.

On the Empire
left: 5 pistoliers; the champion with a repeater pistol. Behind them 5 Knights
of the White Wolf. Further toward the center I placed the commander, Capt.
Stransky on a barded warhorse where he could look across the table at the
Beastmen and pick out targets with his Dragon Bow.


Turn 1:
For the most
part, Turn 1 was all about movement. All Empire units marched forward. Kruger's pistoliers at center table swung around the swamp and were crossing to the far
right to aid the Swordsmen against the Ungor Slingers. On the far left, the
horses successfully began scaling the mountain. Capt. Stransky galloped out
front and, lining up behind the impenetrable forest, got a line of site on the
Giant and Gorgon.


(Above) “The Gap” appears
to be a strategically important location. This is the only terrain-free route
from one side of the table to the other, except for the far right where the
Swordsmen are. The Gap is framed by a mountain (on the right) and the
impassable forest on the left.
The Beastmen led off with Steed of Shadows and I rolled 3 of my 4
Dispel Dice to stop it. I only had one left, which meant I couldn’t dispel
anything more, but any remaining spells would have to be cast at their own
units. The Beastmen followed with Unseen Lurker, which gave the Gorgon an extra
move toward the gap.
Turn 2
The Empire
received a unit for reinforcements, so I selected the rocket launcher that came
on behind the mountain. It was an indirect fire weapon and if I didn’t get it
on soon the enemy would be too close to use it effectively (it’s also not that
accurate). The pistoliers on the mountain were unable to find their way further
up the mountain while Kruger's on the far right galloped up within shooting
range into the face of the Ungor slingers. The units in the center positioned
themselves in a chess like manner, anticipating the Gorgon charging through the
gap and counter-charging. The intent was to put the small Free Company unit out
there first and flee when the beast charged forward, hopefully to counter with
the knights. The Free Company in front of the swordsmen swung out to their side
to protect their flank and the Hunters crossed into the impenetrable forest at
table center (skirmishers & loose formations can navigate through it).

(Above) Ungor Slingers look on at the advancing Empire, hoping reinforcements
arrive before they are overrun.
Magic was 7/5 and Rolf Steiner used 4 dice to attempt to get Master of
Stone off again. With a roll of 16 the Beastmen were unable to stop it and the
spell caused 3 wounds on the Giant. Steiner stored the other 3 dice in the Rod
of Power.
The Beastmen received no reinforcements either. The Gorgon and the Giant began to position themselves in the gap with the intention of supporting each other on the charge. The Gor reached the foot of the mountain and might beat the pistoliers to the top. The Shaman Lord sought cover in the impassable woods while the Ungor slingers on the other mountain moved to the edge to fire on Kruger's pistoliers. The combined 9 slingers fired 18 shots on the Pistoliers and only managed to fell one!
The Rod of Power once again couldn’t hold the stored power dice, so
the Beastmen had an 8/4 advantage in the magic phase. Steed of Shadows was
dispelled once again, but the Shaman Champion successfully cast Pit of Shades
on the White Wolf Knights. They all made their Initiative tests and none fell
into the pit! It was a good time for die
rolls to favor the Empire as things were getting close.

(Above) The Gor herd working their way over the wooded hillock that Steiner
has been trying so hard to control.
Turn 3
No reinforcements for the Empire. It was looking more and more like the battle was going to be won or lost by who was presently on the table. On the left the Pistoliers finally topped the mountain but were unable to see the Gor on the other side due to the trees. On the right, the Swordsmen advanced into charge range while the free company peeled off to the left to deal with the slingers on the mountain.

(Above) Setting up for the charge in the center of the table. The 5 Free
Company are to draw the charge and flee, leaving the Gorgon vulnerable to a
charge by the Knights on the left. Note
Steiner under the tree to the right ensuring everything goes according to plan.
As the units positioned themselves for the chess match at the gap,
Steiner and Stransky backed off a little so as not to get in the way while the
Hunters plodded into the impassable woods to either find the Shaman Lord or the
other side.
With a magic advantage of 6/5 Steiner once again used 4 dice to power Master of Stone. This time there was a miscast! The Beastmen were able to cast one of their own for free, so Unseen Lurker was cast for the Giant to charge the free company. Steiner used all of his remaining power in a vain attempt to dispel it. The free company fled as expected, but only 4” so that they were still obstructing the two units behind. What an unfortunate turn of events! This terrible miscast just set the Beastmen up with free fields of movement to charge with both of their big beasts into the Empire line. Looking for one little victory, Stransky bounced his second arrow in a row off the Giant despite the Strength 6 of the Dragon Bow. The first salvo from the rocket launcher landed wildly beyond the Bestigor unit. On the bright side, the Kruger's Pistoliers on the right needed 7’s to hit the Ungor slingers on the mountain, but were able to drop two of them, causing them to flee to the opposite side of the mountain.

(above) The consequences of the Miscast: The Giant charges after the 5 men of the free company who flee toward their own unit. [Note Hunters on the right entering the impassable wood].
The Giant ended up making contact with the White Wolf Knights while
the Gorgon followed and charged into the unit of Halberdiers. The Gor at the
base of the mountain were unable to find a path up. The Bestigor executed a
left-face so that their column could fit through the gap unencumbered by the
terrain while the Shaman Champion stepped out of the formation and into the
woods.

Turn 4
Brave Captain
Stransky and Steiner the Wizard Lord fled in terror from the Gorgon tearing its
way through the halberdiers. For reinforcements, I brought the Helblaster on,
which took up an opportune position next to the rocket launcher with a field of
fire covering the gap as well as both combats in the middle. On the far right,
the swordsmen charged the small unit of Ungor Slingers who fled out of charge
range and Kruger's Pistoliers climbed the mountain in pursuit. On the far left, the
Pistolier unit there had rough going trying to ascend to the mountain peak and
lost 2 riders along the way, but they didn’t panic and assumed a position to
fire on the Gor once they found their way up the mountain. The hunters in the
impassable forest charged the Shaman Champion who fled.

(Above) The Pistoliers atop the mountain with the Gor down below. In the
background the Helblaster has moved on beside the rocket launcher.

With the Empire Wizard Lord fleeing, the Beastmen had a 9/2 advantage in the magic phase. They led off with the Pit of Shades, which swallowed the 3 Pistoliers on top of the mountain in front of the Gor. The Shaman in the newly arrived Gor unit cast Bear’s Anger on himself. Lastly, Shades of Death was cast on the Bestigor unit so that they caused fear. This would be advantageous if the White Wolf knights attempted to charge. The Gorgon continued to shred the Halberdiers, killing 5 with 8 remaining. It won the combat by 2, but the brave halberdiers held (even with Captain Stransky fleeing nearby).
Turn 5
Captain Stransky rallied along with the free company who were running
alongside him. Steiner was still running, but luckily he only went 3” this turn
so I still had a chance to turn him around. The downside was that there would
be another turn without magic on my side and overwhelming magic on the other
side. The White Wolf Knights declared a
charge on the Gorgon in an attempt to rescue the halberdiers, but failed their
Fear test and thought better of it.


(Above) The Gor on the right finally topped the mountain peak previously held
by the (now dead) Pistoliers where they overlook the Empire line. From left to right: The Helblaster, Rocket
Battery and crossbows with free company screen.
The Shaman on the far left with the Gor unit finally had a clear shot
with the Hunting Spear, which penetrated through the ranks of the swordsmen
like a bolt thrower and took down 4 men! As
expected the Gorgon ran down the fleeing halberdiers straight into the free
company who, thanks to Stransky’s command, held their ground. Rather than
shredding the free company and making himself an easy target for the
Helblaster, the Gorgon chose to swallow a man whole which restored all 3 of his
lost wounds! He was now back to full strength and still in combat so that he
couldn’t be targeted by the nasty volley gun.
Turn 6
A lot of help Wizard Lord Steiner was! After screwing up a spell and giving the initiative to the big beasties to come rampaging through the gap, he lost his nerve and, finally, fled from the battlefield! He’ll be a popular guy after the battle. The White Wolf Knights turned around to face the Gorgon as he would be in their charge arc regardless of how he moved as he was facing the table edge.

The Beastmen still had reinforcements to come on: Their last Ungor Raider unit and their first
Chaos Hounds unit joined the scattered units in the center of the battlefield.
On their left, the Gor and Ungor units charged the swordsmen and free company.
Both fled back toward the oncoming Handgunners to buy some time. In the middle,
the Bestigor and the accompanying Battle Standard Bearer failed to rally and
left the battlefield. With a 9/2 advantage, the Beastmen cast Steed of Shadows
on the Shaman Champion, flying him onto the mountain overlooking the Empire
line. From there, he cast Unseen Lurker with Irresistible Force to get the
Gorgon to charge the unsuspecting Helblaster!
The beast made quick work of the war machine. So much for my visions of an inglorious end splattering the Gorgon on the battlefield.
Turn 7
Once we get past the Warhammer Fantasy limit of 6 turns I call it “extended innings” which is the case since we’re playing a Flames of War Scenario. These are fought until the victory conditions are met or one side quits the battlefield after losing half their force. Speaking of which, the Empire were down 3 units with 3 more to go before they have to start testing for a route roll (quitting the battlefield due to too many losses). The Beastmen were down 4 units with 3 to go. This would change my strategy as, instead of trying to get off the table, there were plenty of small Ungor units in the back of the Beastman battlefield that could quickly allow me to get the Beastmen rolling their army route rolls on a low leadership.

The Beastmen on the other hand, had all of their light, mobile units
on and it made sense for them to head for the opposite table edge. The problem
was that the Pistoliers & hunters on their side of the table were worth a combined 4 VP, which would
be significant if they got off the table. Therefore the Beastmen had to at
least stick with their plan and work on eliminating those units.
The Pistoliers tried to charge off the mountain, but couldn’t find a
way down. The hunters held while the Pegasus vaulted over and out of line of
sight from the Shamen. The swordsmen and free company still continued to run on
the far right. The White Wolves charged the flank of the Gorgon before he could
continue onto the rocket launcher. In the shooting phase, the rocket launcher
went back to dropping rockets uselessly around the battlefield, the hunters
felled 3 of the newly arrived Chaos Hounds who immediately panicked and ran
back off the table. The crossbowmen even managed to score a wound on the Shaman
Champion. The Gorgon killed one of the knights, but the combat was still a
draw.
The last unit of Chaos Hounds came on for the Beastmen. The 2
remaining slingers fled off the table, while the Gor on the far left marched to
try and keep up with the fleeing swordsmen.
Two of the Ungor Raiders remained in position to fire on the hunters in
the forest while the third made the risky move of flank charging Captain Kiesel
on the Pegasus. The Shaman Champion backed up on the mountain to get out of
line of sight from the crossbows while the Lord headed to the rear to assist in
the scattered mess going on back there.
The Beastmen still had a 10/2 advantage in magic and led off with the
Lord using Steed of Shadows to move onto the end of the mountain, not far from
the pistoliers. He followed with Shades of Death on the Ungor fighting the
Pegasus. If they won the combat and caused fear, the Pegasus would be forced to
break. In the shooting phase, the Ungor Raiders dropped only 1 of the hunters
with their short bow shots.
The Ungor fighting Captain Kiesel had a Halfhorn champion, so the
Captain issued a challenge. The Ungor strategy was to ignore the captain with
his 2+ Plate Mail armor save and focus on the unarmored Pegasus, therefore the
Halfhorn declined and stepped back allowing the others to pile onto the
Pegasus. Although the Ungor caused 2 wounds on the Pegasus, they took 3 in return
and lost the combat. The unit fled off
the table as the Pegasus pursued, making the 7th unit eliminated on
the Beastman side. Their next turn would start with a route roll to see if they
remained in the fight. Considering their Lord only had a leadership 7, I was
confident victory was at hand.
Turn 8
With my right flank essentially running away the only place I needed serious help was against the Gorgon, so Captain Kiesel took to the sky and headed back across the table to save the Empire line. The swordsmen and free company on the far right finally rallied and Captain Stransky moved so that he could still get a shot at the Shaman Champion with his Dragon Bow. With the inevitability of the Gorgon coming their way, the crossbowmen reformed into 2 ranks and turned to face the approaching beast. Their free company detachment lined up to support their flank. After another useless shot from the rocket launcher, the cannon struck the first 2 ranks of the Gor on the far right, killing a pair. Most remaining shooting was ineffective and the Gorgon made quick work of the remaining 2 knights.

When their turn came up, the Beastmen passed their route roll with a 6. Damn! The Gorgon charged the rocket launcher, where the crew fled and were caught (above). The Gorgon’s momentum carried him into the waiting line of crossbows and their free company promptly charged him in the rear.
I didn’t expect common men to win against the beast, but hopefully there were enough to stall until the Pegasus got there. After an ineffective magic and shooting phase, the Gorgon killed 4 crossbowmen but took 2 in return from the free company!

Elsewhere on the battlefield, losing their patience for ineffective
shooting, the 2 Ungor Raider units charged the hunters lurking on the edge of
the forest. It was a successful charge killing 2 and taking none in return, but
the hunters’ bravery held.
Turn 9
On the Empire right, the free company attempted to charge the Ungor Raiders supporting the flank of the Gor, but failed. The pistoliers tried to come down off the mountain to assist the hunters but couldn’t find a way down. Capt. Stransky helped by plugging the Shaman Champion with an arrow from his Dragon Bow, sending him to his grave. In the combat between the Ungor and the Hunters, neither side scored a wound so the hunters lost again due to unit strength, but they continued to hold. The free company & crossbows fighting the Gorgon inflicted 2 more wounds, bringing his total to 4, but he successfully swallowed another man whole and, again, restored 3 wounds. He still comfortably passed his Leadership 10 break tests since he was stubborn.

(Above) The Beastmen passed their route roll again, so the battle wound
continue. On their left, the Gor charged the swordsmen and the Ungor charged
the free company. The Chaos Hounds made their way to the gap in the middle of
the table; if not to assist the Gorgon then to get off the table and score a
victory.
The magic phase was ineffective, but close combat delivered favorable
results for the Beastmen as the Ungor in the forest took down 3 hunters in
exchange for 2 of their own. The hunters finally broke and were rundown by the
two small Ungor units as they fled through the forest. With this development, we officially entered
the “blood bath” phase and the Empire would also start rolling Route tests at
the start of their turn as well.


Back at what was left of the Empire line the Gorgon killed 3
but sustained another 2 wounds, so he was back up to 4 wounds out of 6 (time to
swallow another man).
Turn 10
The Empire passed their Route test. Kruger's pistoliers were finally able to get off the mountain
and, firing on the Beastman Shaman Lord, caused 2 wounds. Captain Stransky
failed his fear check and lost his nerve to charge the Gorgon, leaving the men
to their fate.
With the help of Bear’s Anger on the Level 1 Shaman, the Gor unit took down 4 handgunners and prevented any attacks back. The Ungor Raiders killed 2 from the free company and, once again, both units broke only to be run down as they fled.

Suddenly, the Gor unit found itself all alone only a few inches from
the table edge where they could waltz off the board and declare a victory. The
Gorgon failed to swallow another man whole and suffered 2 more wounds, bringing
the tally to 5 wounds out of 6. Once
again, because he was stubborn he had no intention of breaking from combat.
When the Beastman turn came up, they finally failed their Route roll
and called it a day.
With no units getting off the opposite side of the table, it came down
to tallying up victory points the old fashioned way. Because the Beastmen quit
the field, the Empire could claim the table quarters, but only had 2 surviving units of unit strength 5 or more, so they could only claim 2. The final score was
Beastmen 1,472 and Empire 1,225. A Draw.

To represent the progress of the army, I used the Mordheim rules for
recovery and advancement. Any units lost could be replaced with something
different as long as I came back up to my 2,000 points. So, Steiner got demoted
to a Level 2 and was joined by a second level 2 Wizard. I let him keep his Rod
of Power. The useless rocket launcher was also ditched and replaced with a
mortar. All others got replaced and I used the extra savings from ditching the rocket launcher to add an additional knight to the White Wolf
and upgraded them Inner Circle (strength 4) so they had more punching power.
Next, it’s off to Bretonnia to fight an underpowered Bretonnian Errantry army in a Last Stand scenario!

Beautiful. Just Beautiful
ReplyDelete